
Two-point perspective helps artists depict objects as they appear to the human eye, especially when those objects are not facing directly forward but instead are turned at an angle. This technique is crucial for creating scenes that look natural and believable.
Contents
What is Two-Point Perspective?
- Definition: A drawing technique using two vanishing points on the horizon line to create the illusion of depth and three-dimensionality.
- Usage: Ideal for realistic representation of objects that are angled, such as buildings, furniture, and streetscapes.
Basics of Two-Point Perspective
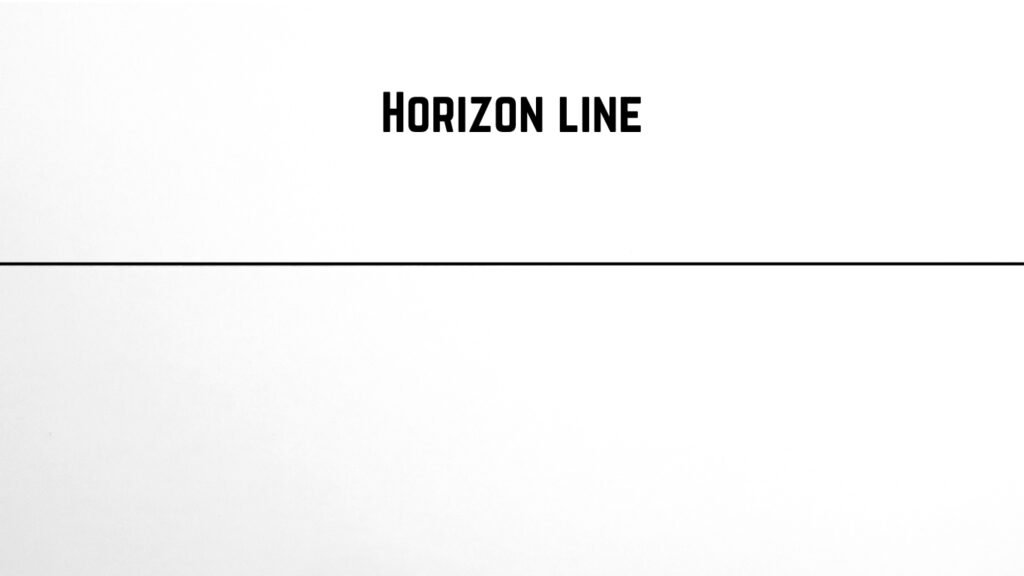
- Horizon Line: The line at eye level where the sky and ground meet. It sets the foundation for the perspective. Everything above this line will appear as if you are looking up at it, and everything below will seem as if you are looking down.
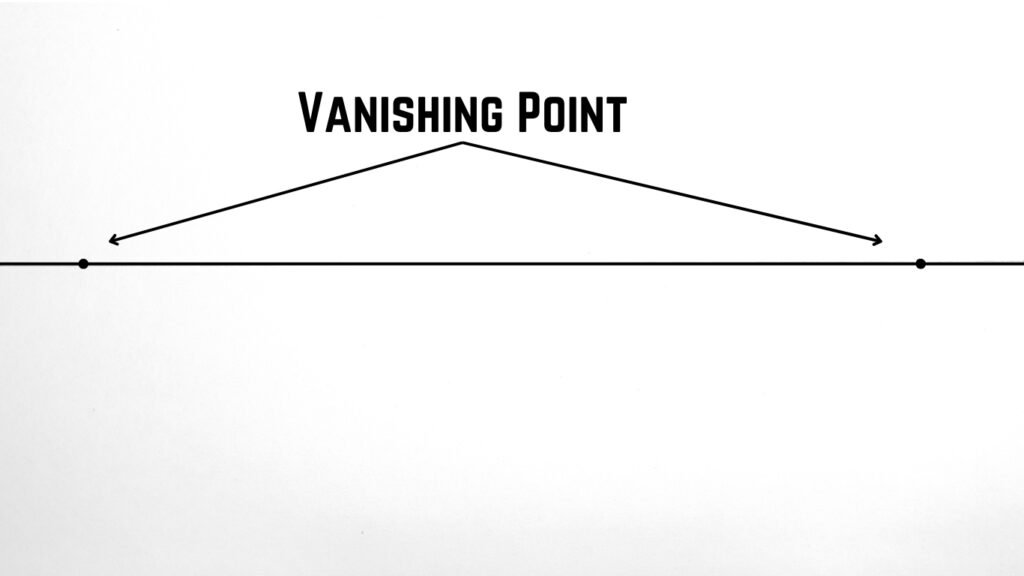
- Vanishing Points: Two points placed on the horizon line, one on the left and one on the right, where parallel lines appear to converge. These points determine how the object will be angled and how it recedes into the distance.
- Vertical Lines: These lines remain upright and do not converge, representing the edges of objects that are perpendicular to the ground. They maintain the height of the object.
By understanding these elements, you can create drawings that convincingly depict spatial depth and proportions, adding realism to your artwork.
Drawing in Two-Point Perspective
Step 1: Horizon Line and Vanishing Points
- Horizon Line: Draw a horizontal line across your paper to represent your eye level.
- Vanishing Points: Place two dots on this line, one near the left edge and one near the right edge. These will be your vanishing points (VP1 and VP2). The further apart these points are, the more realistic and less distorted your drawing will appear.
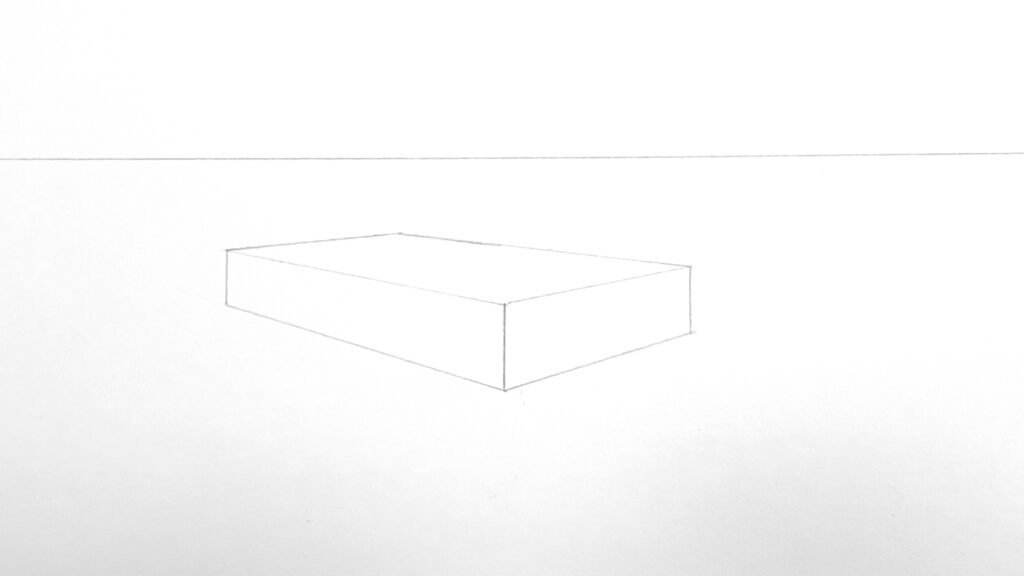
Step 2: Corner of the Cube
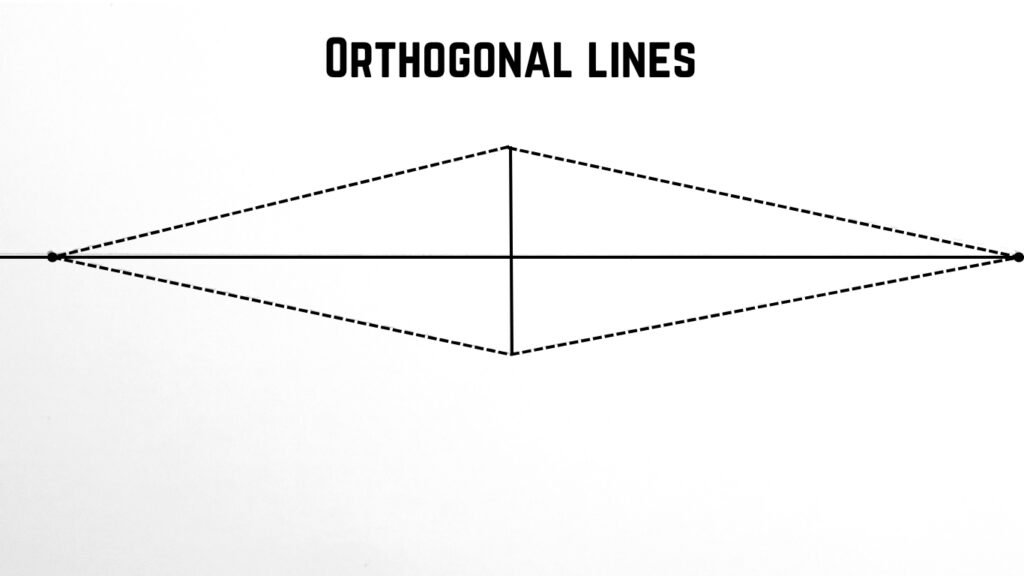
- Vertical Line: Draw a vertical line between the vanishing points to represent the closest corner of the cube, which will appear straight and upright. This line should be of a length that corresponds to the intended height of the object.

Step 3: Connect to Vanishing Points
- Orthogonal lines: From the top and bottom of the vertical line, draw orthogonal lines that extend to each vanishing point. This forms the edges of the cube that recede into space. These guidelines will help you define the sides of the cube.
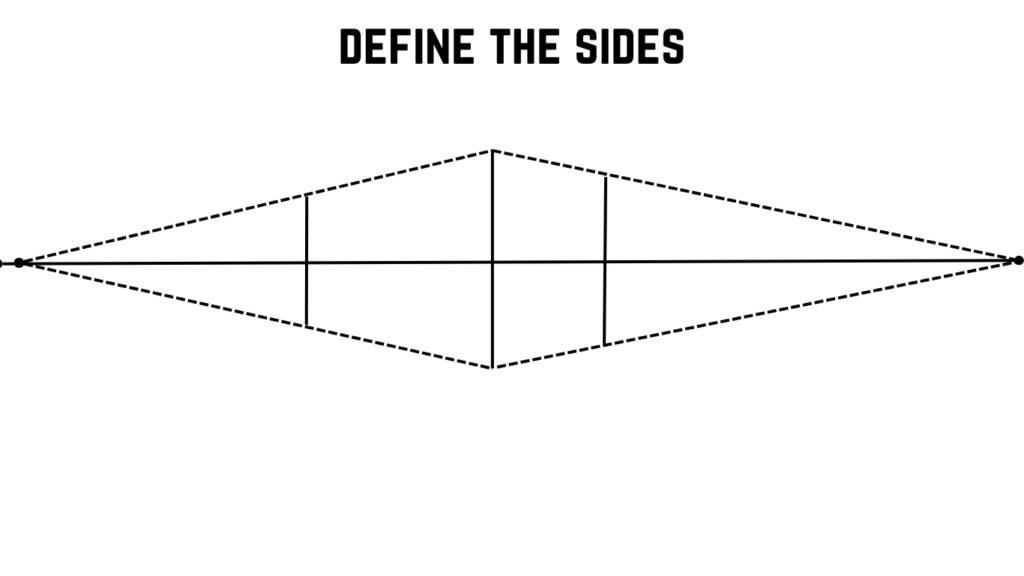
Step 4: Define the Sides
- Vertical Edges: Draw two more vertical lines between the top and bottom guidelines to define the cube’s visible sides. These lines should be parallel to the initial vertical line and spaced according to the intended width of the cube.
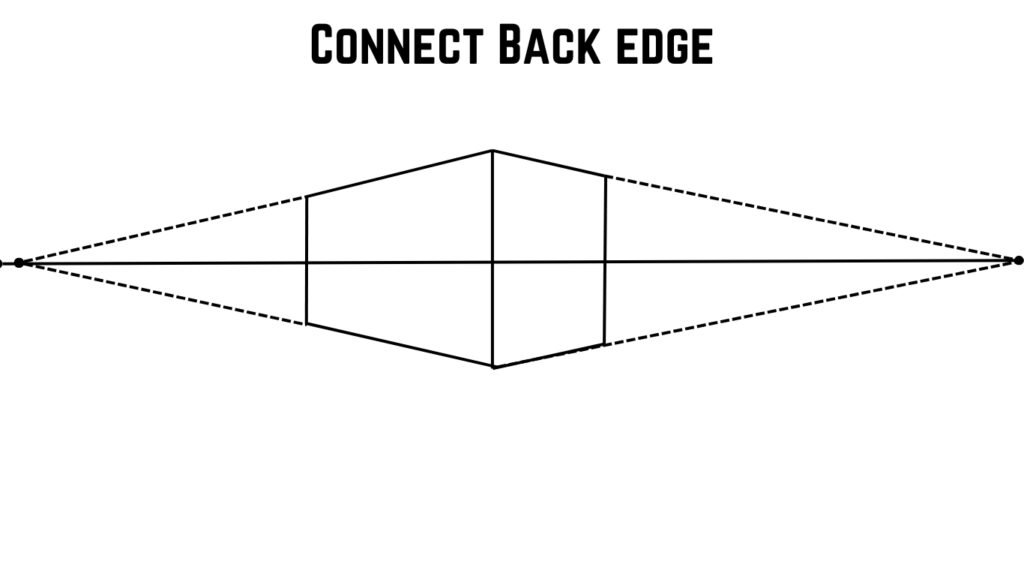
Step 5: Back Edges
- Connect Back Edges: Draw lines from the tops and bottoms of these vertical lines to the opposite vanishing points, forming the back edges of the cube. This step closes the cube, making it a three-dimensional form.
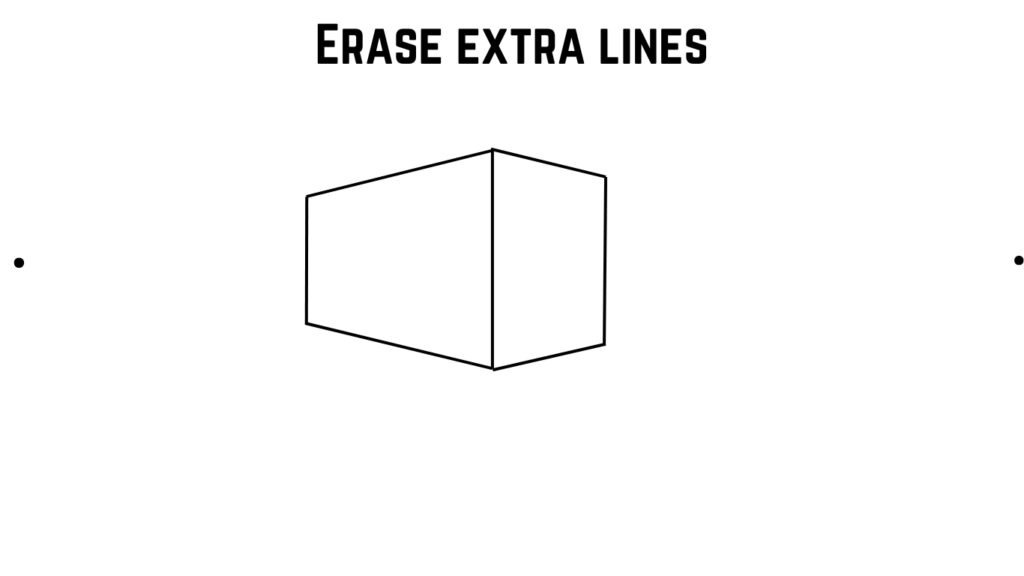
Step 6: Clean Up
- Erase Extra Lines: Remove unnecessary guidelines to clean up your drawing, revealing a three-dimensional cube. This clean up helps in focusing on the object without the distraction of construction lines.
Applying to Real-Life Objects
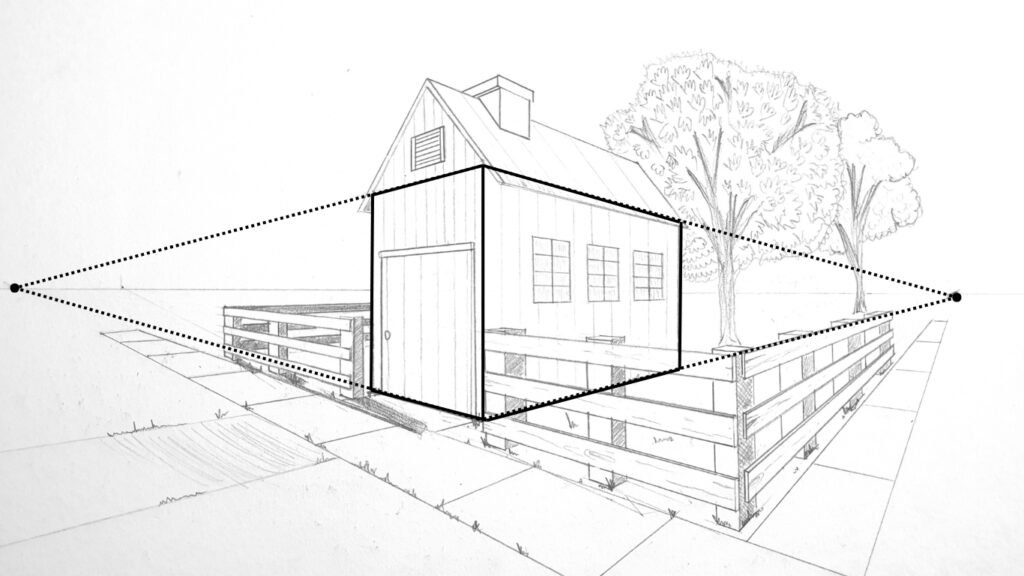
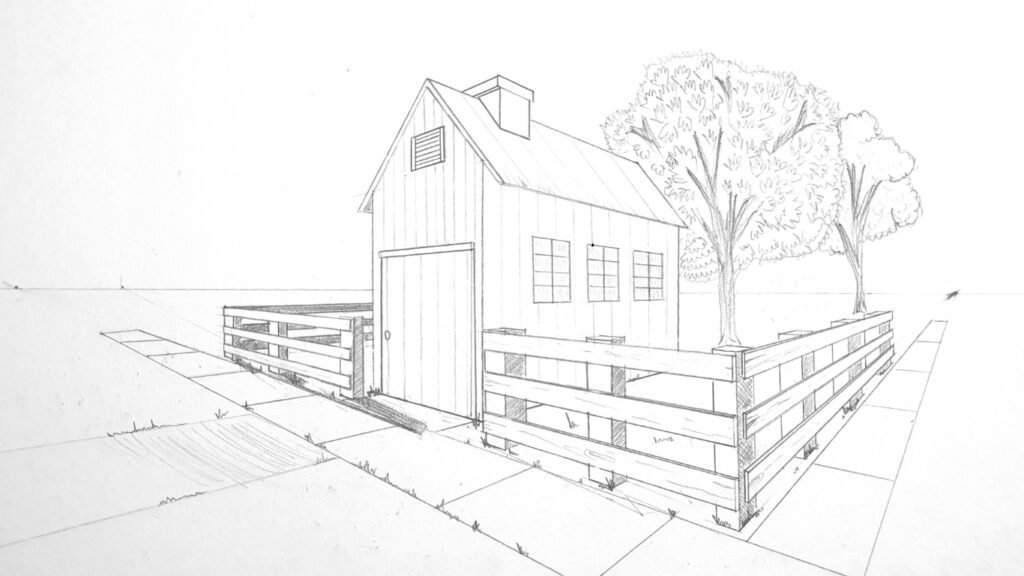
Drawing a House
- Start with a Cube: Begin by drawing a cube using the steps above as the basic structure of the house.
- Add a Roof: Draw a triangle on one side of the cube to represent the front of the roof. Extend lines from the triangle’s top to each vanishing point to shape the roof.
- Extend the Roof: Use the vanishing points to draw lines extending the sides of the roof, giving it depth. This will make the roof appear as if it is projecting outward.
- Add Windows and Doors: Sketch these details using lines that follow the vanishing points to maintain the perspective. Ensure that these elements are proportionate and aligned with the perspective lines.

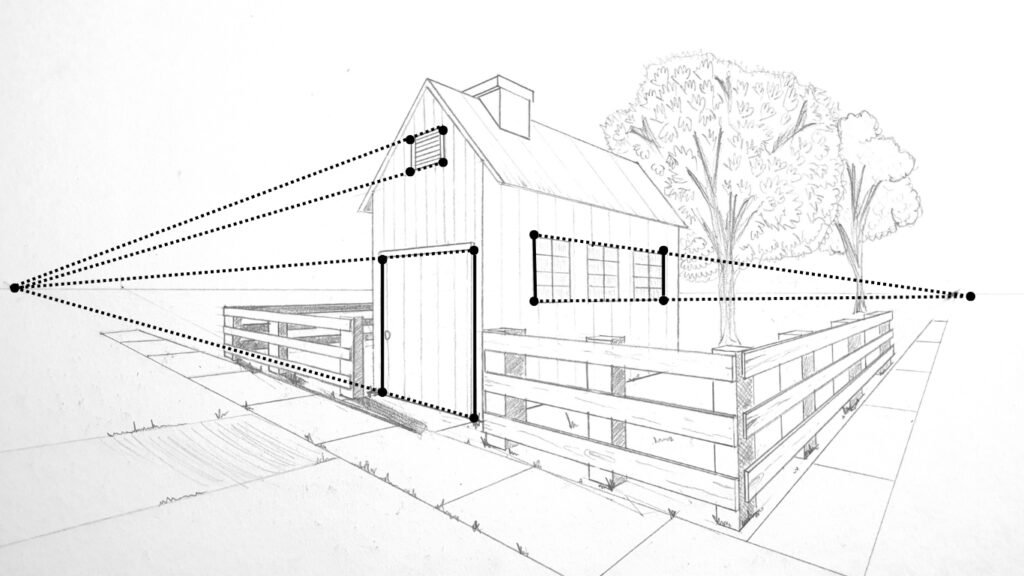
To further enhance your house drawing, you can add textures such as brickwork or wooden planks. Use fine lines to represent these textures while maintaining the overall perspective.
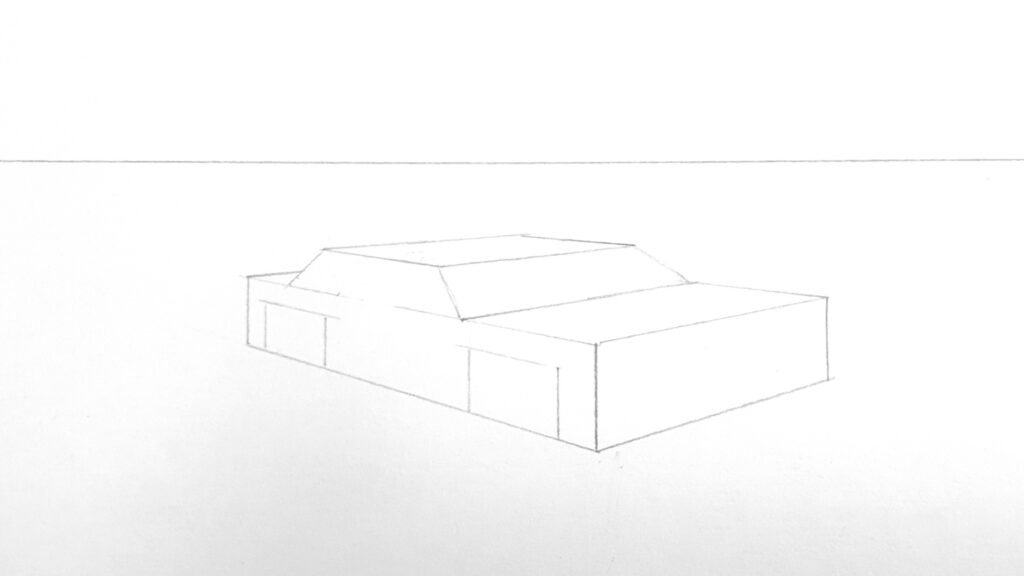
Draw a Car
- Rectangular Block: Start with a basic rectangular block to represent the car’s body. This block will serve as the main frame.
- Shape the Car: Use the vanishing points to shape the sides, hood, and roof of the car. Adjust the angles and curves according to the car’s design.
- Details: Add wheels, windows, and other features, ensuring all elements follow the perspective lines for realism. The wheels, for example, should be elliptical due to the perspective distortion.


Common Mistakes and Tips
- Vanishing Points Too Close: Avoid placing vanishing points too close together to prevent distortion. Keep them far apart for a more natural look.
- Ignoring the Horizon Line: The horizon line is crucial for maintaining correct perspective. Always refer back to it to ensure consistency in your drawing.
- Overcomplicating Early Attempts: Start with simple shapes like cubes and gradually move on to more complex forms as you gain confidence. This approach prevents frustration and helps in building foundational skills.
- Another common mistake is neglecting to check the alignment of objects with the vanishing points. Periodically check your lines to ensure they lead correctly to the vanishing points.
Practice Two-Point Perspective
- Daily Sketches: Practice by sketching simple objects in two-point perspective daily. This helps in building muscle memory and understanding of the technique.
- Real-Life Observation: Observe buildings, streets, and interiors in real life. Notice how lines converge towards vanishing points in the distance.
- Use Photos: Practice by drawing from reference photos, which can help you understand how two-point perspective works in real-world settings.
Advance Techniques
- Multiple Objects: Practice drawing multiple objects in the same scene, ensuring all follow the same vanishing points for a unified perspective.
- Complex Structures: Try drawing more complex structures like staircases, arches, and vehicles, applying the same two-point perspective principles.
- Light and Shadow: Add light and shadow to your drawings to enhance the three-dimensional effect and create more realistic scenes.


Using different light sources can dramatically change the mood of your drawings. Experiment with shadows and highlights to see how they affect the overall composition.
Conclusion
- Mastery Through Practice: Mastering two-point perspective requires consistent practice. Start with basic shapes and gradually build complexity.
- Enhance Realism: This technique is invaluable for creating realistic, three-dimensional drawings that convey depth and space.
- Patience and Perseverance: Like any artistic skill, patience and regular practice will lead to improvement and more lifelike representations.
By incorporating two-point perspective into your drawing practice, you’ll unlock the ability to create dynamic, realistic scenes that capture the viewer’s eye. Start your journey today and watch your drawings transform with depth and dimension.
Remember, every artist was once a beginner. Your dedication to mastering two-point perspective will pave the way for more intricate and captivating artworks.